The Rover System is designed to be used with any software billing package that has the capabilities of uploading either 160 Byte Data Exchange Files or 500 Byte Data Exchange files. It is especially useful for those companies using the Mars for the 21st Century billing system by RailTech Software Systems.
The price of the Rover software can be found on the main page of this site under Pricing.
Below is the Visual Guided Tour of the Rover System Software:

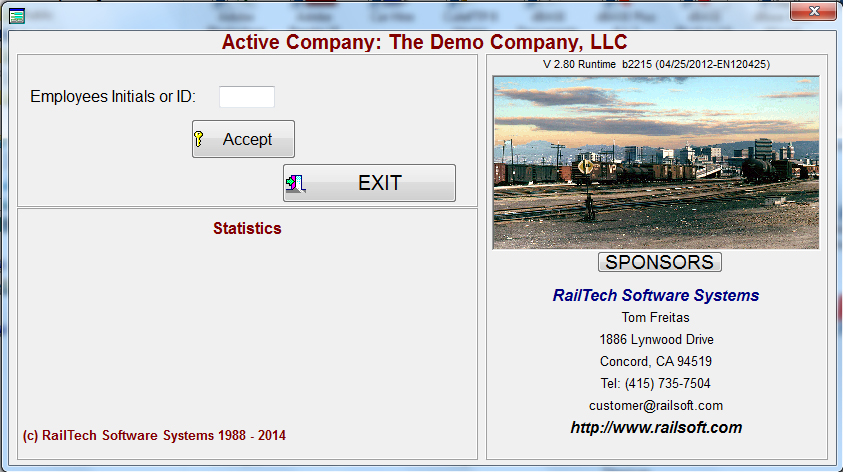
The first screen will always ask for the employee's initials or ID. This entry is four positions in length and requiers at least two positions to be filled in. The entry can be either numeric or characters. Once the entry has been made, than select the "Accept" push button and you are ready to start.

Rover21 is designed so that you can enter data in the entry fields multiple ways. If you double tap on an entry field, the above on screen keyboard will appear. Note that at the bottom of the key board it displays the field length and what the field is that you are writing too. Simply tap on the letter or number and it will appear at the top. If you make a mistake, then press the Backspace key to change what you entered. The system will validate any changes you make before it sends the entry to your screen.

Now you are ready to begin! The Statistics will always display what is currently setup on your system and how many cars and lines of repairs are there. When you first start up the system you should select the Options push button for how your data formats should be.
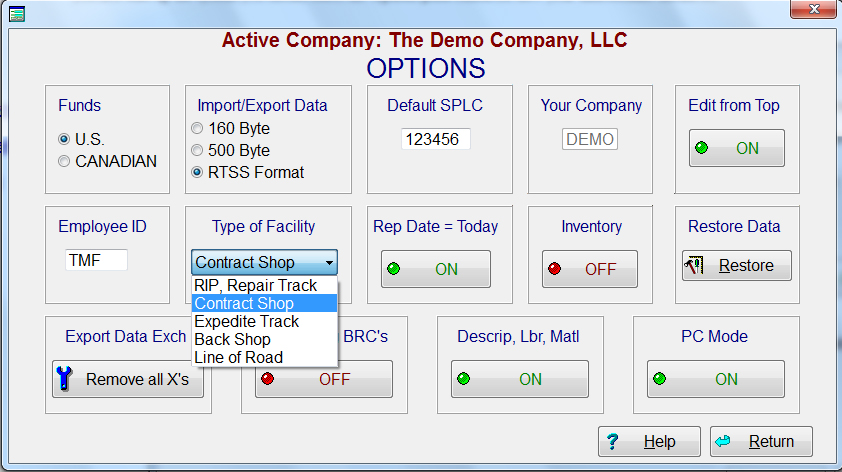
The Options screen allows you to choice what currency that you will be using. This can be changed at any time depending if you are billing in U.S. or Canadian currency. Once the AAR has a price master for Mexico, that will also become a selection. The next selection is how you want to be able to upload and/or download data. These selection are; 160 Byte Data Exchange, 500 Byte Data Exchange or RTSS format. The RTSS format is only for those companies that are using the Mars for the 21st Century software. The SPLC is for the default SPLC to appear in billing repair cards. The SPLC can be changed on the billing repair card at any time. The next switch displays the initials or mark that your company uses. Auto Pricing should almost always be set at OFF so that your billing software, not ROVER, will price the repairs. However, if you tune Auto Pricing ON, the Rover21 software will calculate prices at the AAR rates based on your repair date. The type of facility is a selection of four entries; Rip, Contract Shop, Expedite Track and Back Shop. If you select to have the repair date always show today's date, then the push button should be at ON. As you can see, there are spaces for future switches to be added

The Utilities screen currently has four selections. The first is for Re-indexing All Files. This is a safety function only and will recreate all the indexed file automatically. The selection for Job Codes allows you to create job codes in one of four files, AAR Non-Pricing, NitLeague, Default User Job Codes and Customer Specific Job Codes. The NitLeague Job Codes come with the software and can be modified. When you select one of the files and then press the OK push button, a screen will appear that allows you to enter job codes and place validation criteria to them. AAR Price Master are very large in nature and should be deleted from time to time. We do not recommend more then the current and previous quarter price master on your system. This utility will allow you to delete any price master you want. The Personal Notes is a log of what ever you want to save. It can be used as a reminder or anything else that you can imagine. The Job Code entry tour can be viewed in the Guided Tour-Billing System
Another feature in Utilities is our reporting feature. The pull-down allows you to choose between several reports; Detail Billing Repair Card, Summaries of Billed Road, Repairing Road, Repair Dates, Job Codes, Why Made Codes, SPLC's and PO Numbers as well as JIC's. Any report can be filter by checking the check box on the top right of the report section. The JIC report will give you a JIC based on all responsibility codes unless you filter for only responsibility codes of 3. Reports can be viewed, printed or sent to a file in various formats.
To view how the UMLER Air Brake Report works click here
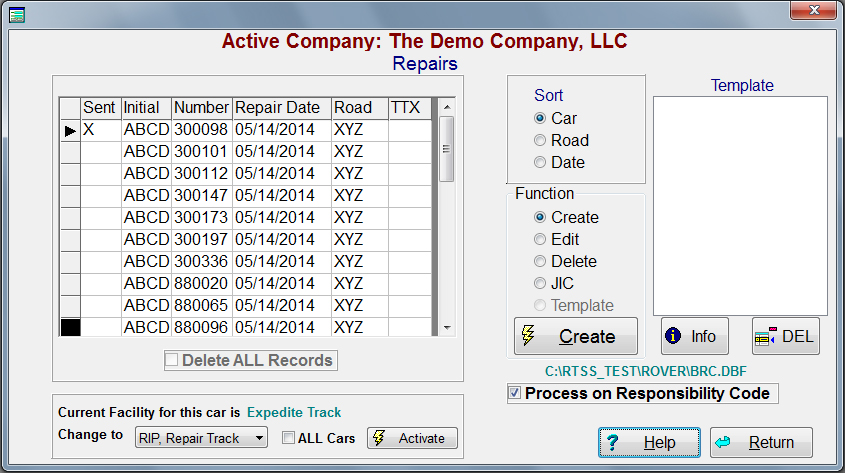
When you select Repairs from the main menu, this screen will appear. It will display all cars that you currently have on your system. You have four choices in this screen. You can Create a new billing repair card, select a car to Edit, Delete the selected billing repair card or Create a JIC. The TTX indicator above, is for any TTX repair from a contract shop the bills TTX in the TTX format. You have the ability to sort the display by Car Number, Road or Repair Date. If you select JIC, then a screen will appear for creating a JIC; see below. The Templates are created from the Mars for the 21st Century program and copied using a utility to the Rover21 system. You can select the template then press the Info push button to view the information pertaining to this template. You may also delete individual templates. To copy a template, simply click on the template then select Templates from the Function area. A screen will appear where you enter the road, car initial, number and repair date. The system will validate what you enter as well as check to see if this car is currently in your file. It then will ask you one more time if you want to continue. If you indicate YES, the system will then copy all the repairs to your file for editing.
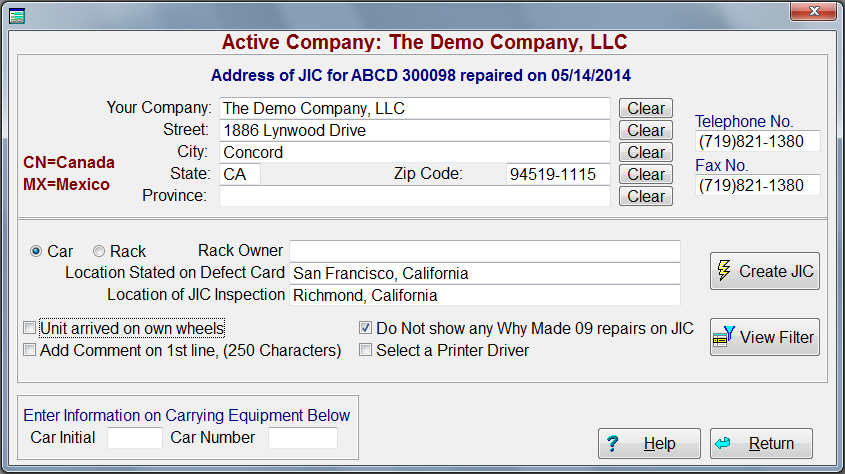
The JIC screen will create a JIC based on responsibility code of 3 repairs and will be in the entry order. Enter the fill in information then click on the Create JIC and a JIC will be created. If you check on the check box for Create PDF file, the JIC will be saved on disk as jic.pdf.

If you create or edit a billing repair card, this screen will appear. When creating, only the header information will appear. Once you fill out all the information, then you press the push button with the Blue check mark. The blue check mark will then be replaced by an E. This means that at any time you can edit or change the header information if necessary. When entering or editing the header information, the system will validate each field and will not allow you to move any further unless the entries are correct. If you are using only AAR Job Codes, then it is best to use the Assist Push Button. Once all fields are displayed in the entry fields, then press the push button with the green check mark to the right of the responsibility entry field, and the system will then validate the repair. As you can see from the above screen, there are many options that you can select from while creating or editing a billing repair card. If you check the check box, Estimate, then the repair will be considered a Quote or Estimate. If you have the Discount push button set to ON or the Inventory selection at the bottom of the screen set to anything other then NO INVENTORY, the system will never automatically price. However, you can manually price any line by double clicking on the line. A screen will appear asking if you want to change the Description, Labor Amount or Material Amount. Once you select the item you want to change, the on screen keyboard will appear. The funds being used, the type of car and what price master is being used will always appear at the bottom of the header information. The system will hold any customer specific Price Master and/or Customer Job Code files that were created with the Mars for the 21st Century software.
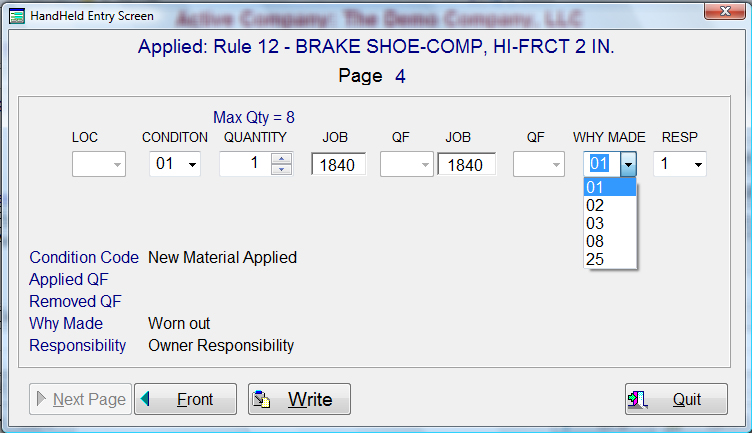
The Assist is a full working digitized AAR Field Manual. The first screen has a pull-down where you select the main topic. In the field manual it is the bold print in the Table of Contents. The next selection is the sub-category of the main topic or the selections below the bold print in the Table of Contents for that specific selection. The next selection shows all the job codes and descriptions for both applied job codes and removed job codes. The selections are all pull-downs and only the appropriate job codes per Section B will appear for any job code that is selected. The last screen shows the line of repair as you have selected. This screen also has all the possible location codes, all the possible condition codes, quantity selection up to maximum allowed, all possible qualifiers, why made codes and responsibility codes. When finished, you simply press the push button marked Write and the line of repair is entered in the entry fields of the billing repair card. To view how the Assist function works, go the Guided Tour - Billing System
